Several friends have told me they love the drinks I make on my Instagram page (@architecture_of_the_cocktail) but would like more basic information. As we head into the holidays, many of us will be entertaining for the first time in a year and a half, so I have broken down my thoughts on what it takes to assemble an efficient and flexible home bar. I will outline the basic home bar setup – one that will allow you to make the majority of cocktails out there without any obscure spirts or mixers, and without any elaborate preparation of equipment. So here we go. The following will be posted weekly. Feel free to disagree. It’s your bar – and your cocktails.
WEEK 1: Tools
WEEK 2: Spirits
WEEK 3: Technique
Week 4: Glassware
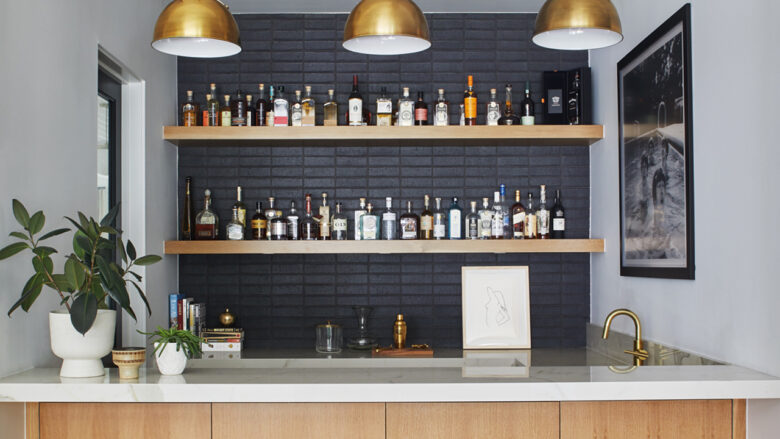
Home Bar 101 – WEEK 1: Tools
Everyone likes different cocktails. I know people who drink nothing but Old Fashions and Manhattans, and others who don’t like anything that tastes like alcohol. This may push you to set up your bar weighted on what you will be making most of the time (especially if it is only for you), but even if you only like Margaritas you may still want to be prepared if someone wants a Martini. So the following is what I believe are the essentials, with a few extras at the end. If you love Mojitos you are going to want a good muddler. If not – you can easily get by without one
THE ESSENTIALS
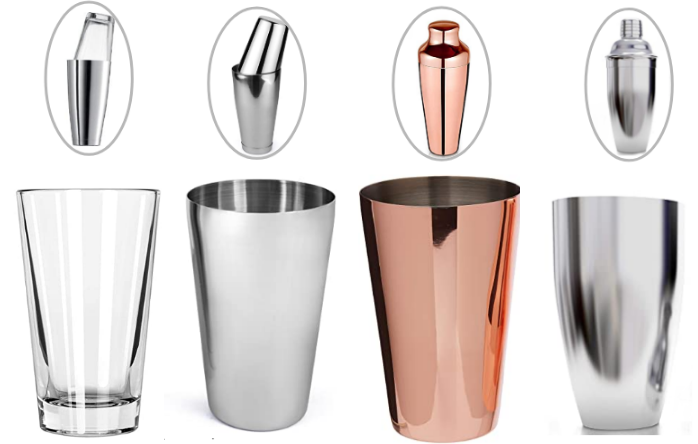
Shaker
The shaker is, I believe, one of those specialized tools that you MUST have in your bar. The Cobbler Shaker dates to the first half of the 1800s when the Sherry Cobbler (thanks in no small part to Charles’s Dickens including it in his 1842 ‘The Life and Adventures of Martin Chuzzlewit’) became the first shaken drink and took world by storm. The built-in strainer captures the ice and any fruit or additives shaken with the spirits. This is the shaker that is likely included if you buy a ‘bar set’ – but I am not a fan. The ice makes the metal contract, and it can be very difficult to get the cap or the top off, and the holes are large enough that you will likely need a second fine strainer for many drinks. Many love them, but not me. I tend to like the Boston Tin Shaker. Some use a single tin and a pint glass (see image above), but the double tin shaker has a small side and a large side that nest into each other. Almost immediately, the tins contract in the cold and the two pieces clamp together to form a seal – unlike the pint glass which has a habit of leaking – if not separating mid-shake. Never cool when you are trying to impress your friends. I do, however, have a large Cobbler Shaker that I can make three drinks at a time in. Not an everyday tool – but useful when you need it.
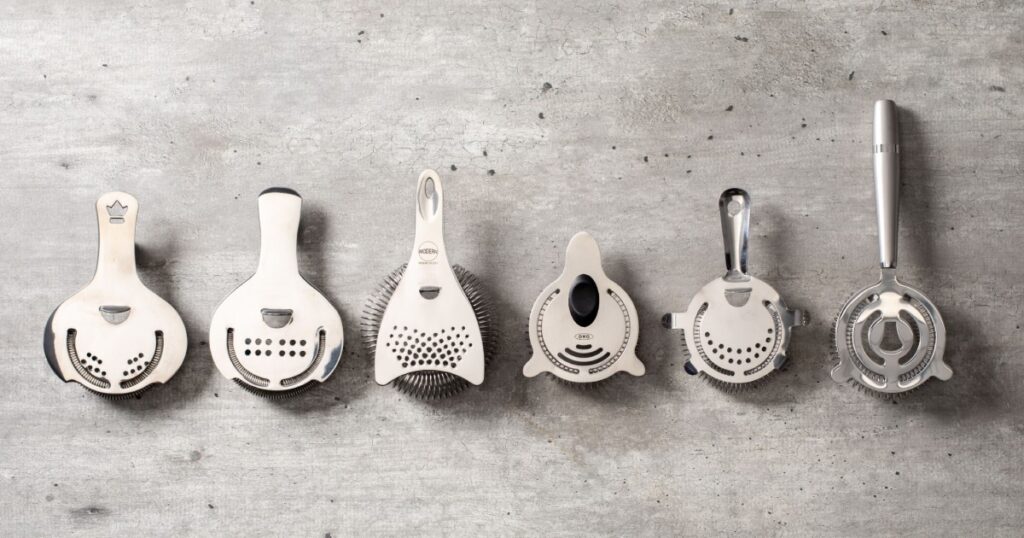
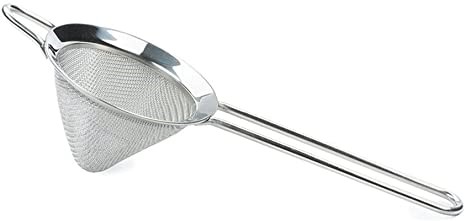
Hawthorn Strainer
The Hawthorn Strainer is sized to fit into a pint glass or shaker tin and used to strain into the glass for a drink served up, or over fresh ice for drinks on the rocks. It can be held with the same hand as holding the tin, so it is very useful. The finer the coil (there are many types out there), the better at capturing small shards of ice or material from fruit. However, a very fine coil is also so good at capturing debris, and this can make it difficult to rinse off between drinks, especially mint.
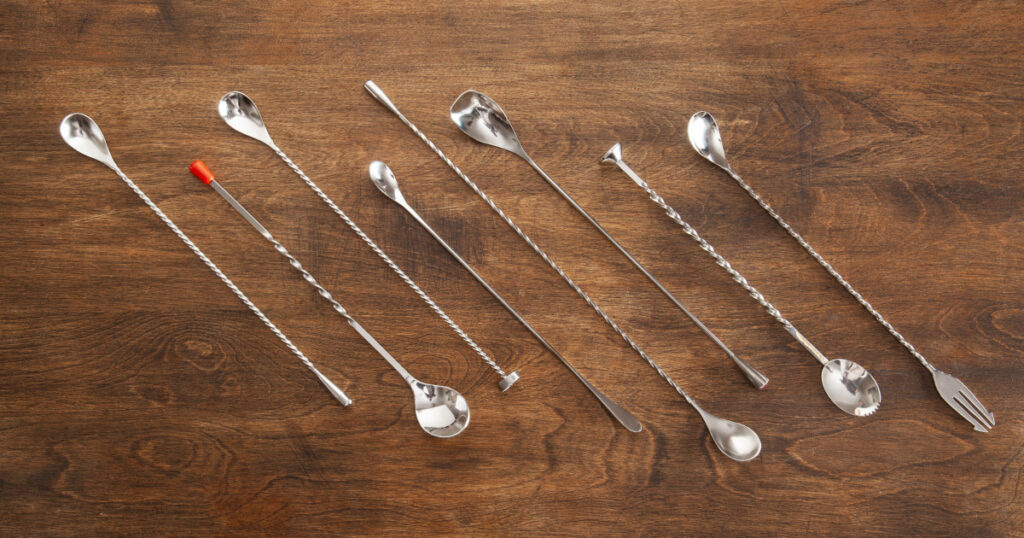
Mixing Spoon
Do you need a dedicated mixing spoon? No. You can mix a drink with a spoon from your existing utensil drawer (or your finger for that matter). But it won’t work very well. A mixing spoon is tall enough that you can mix above a tall glass and is weighted at the end for balance. The key in mixing drinks is not to bang into the ice and break it up (see WEEK 3: Technique post later), and a good spoon will do that. Spend the $7 and buy a good spoon (or three). The Japanese mixing spoon (my recommendation) is exceptionally well balanced, thanks to a weighted bulb on the top, has a spiral shaft that helps with rotation and layering (see WEEK 3: Technique post later), and the spoon bowls themselves are consistently sized for measuring. The American cheap red plastic cap spoons are produced to be inexpensive (and likely included in your ‘bar set’) and are useless – so throw it away. Some spoons come with a fork at the end or a muddling plate. The forks leave a huge hole in your cherry or olive, and while the muddling plate spoon is handy, it must be cleaned off before you stir, or you will get simple syrup ot sugar running down the shaft and onto your hand when you turn it to mix. Just buy a Muddler Stick and be done with it.
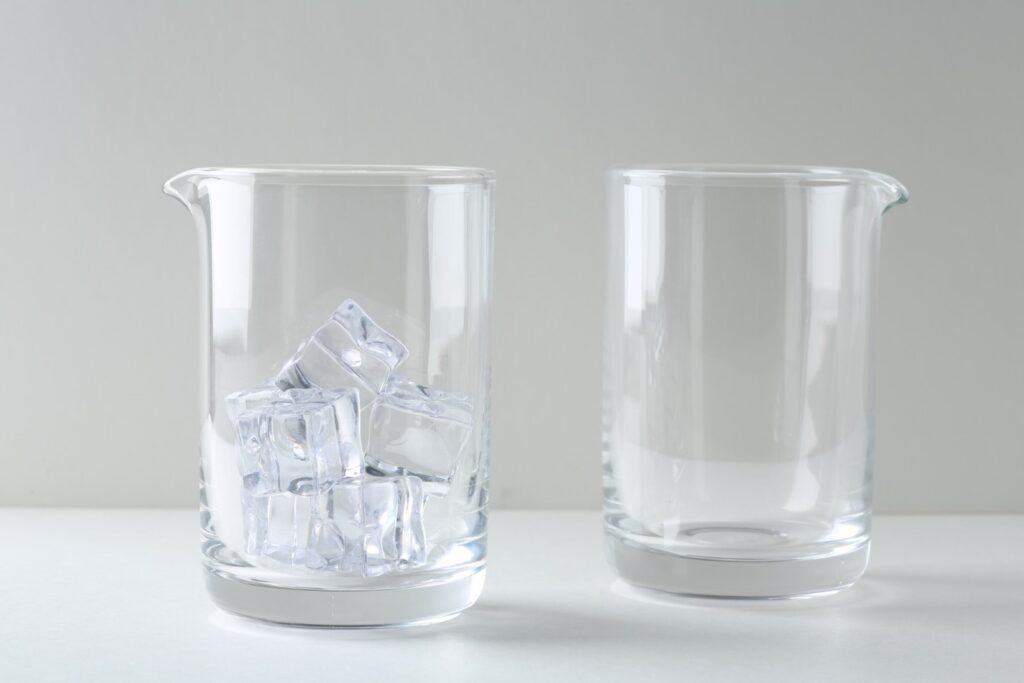
Mixing glass
While a dedicated mixing glass is not a must, since you can use one half of the shaker set or a pint glass to mix and stir, I still think it is essential. Mixing glasses are thick and will help keep a drink cold (the metal shaker tin transfers heat very quickly, allowing the ice to melt too fast), especially once the drink gets cold – pro tip: if you have the ability, place your mixing glass in the freezer prior to using. A mixing glass will also have a heavy base, which holds the glass in place while stirring and is thick enough that it will stand up to aggressively muddling sugar for an Old Fashioned. Some are clear, some are etched, but most come with a pouring spout. And honestly, it looks like you don’t really know what you are doing if you mix in a pint glass that was a handout from your last 5K race or an old jelly jar.
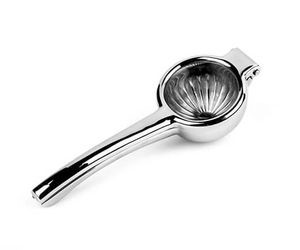
Juicer
You must have. Must. Nothing replaces freshly juiced fruit. You can get away with using canned or bottled pineapple (really, who has a pineapple press at home?), and in a pinch orange – although fresh is better – but there is no replacement for freshly squeezed lime or lemon. These typically come in two sizes and buy a good metal or aluminum one. The acid from the lemon and lime can eat away plated colored finishes – and I assume add them to your drink. The small size is for lemons and limes, and a larger one for oranges, but you really only need a small one. I have very little use for an orange press (the larger version) – I just use a cheap reamer for fresh orange juice. A good quality metal hinged citrus press is not expensive – and you will use it a lot so don’t reach for the cheapest one.

Jigger
This one is essential, but there are tons of variations, and different people like different jiggers. Most are dual sided and are either 2oz-1oz or 1-1/2oz-3/4oz. Some are like simple measuring cups with marks on the inside that can be useful. Some are short and squat (Classic Jiggers), some are round with a handle (Leopold Jiggers), and some are slender and tall (Japanese Jiggers). I prefer a Japanese Jigger as they are well balanced and easier to use without spilling. I have a ton of jiggers, but literally the only one I use is a slim stainless steel 2oz/1oz Japanese Jigger. It is exceptionally well balanced, and the 2oz side has a mark at 1-1/2oz and the 1oz side has marks at 1/4, 1/2, and 3/4oz. I use a Piña brand which is on the expensive side, but there are a lot of less-expensive ones on Amazon.
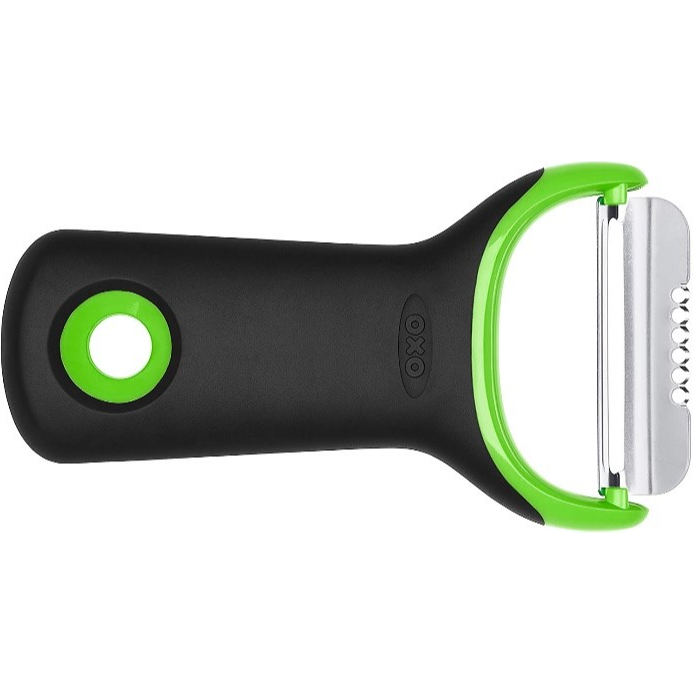
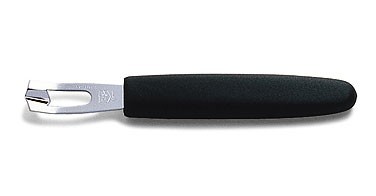
Peeler
Cheap and useful. You don’t need to spend a lot on one – but you need one.
Citrus knife/cutting board
A good citrus knife is a must for cutting fruit, and you need a cutting board that can get wet and stand up to the acid from the citrus.
Wine Opener
What ever you want. From a utility pocket opener to a battery operated cork remover.
Cocktail picks/toothpicks
You can use the disposable bamboo or plastic ones, but I prefer a set of stainless steel ones that can be thrown in the dishwasher. Far classier than a toothpick.
These are the essentials. You can buy them as a set, but if you haven’t already, don’t. Parts of it will be useful, and other parts will be cheap to make the set affordable. Petty much why I have a ton of jiggers I don’t use. But beyond those listed above, there are specialty tools that you may want to consider, based on your drinking preferences.
THE EXTRAS
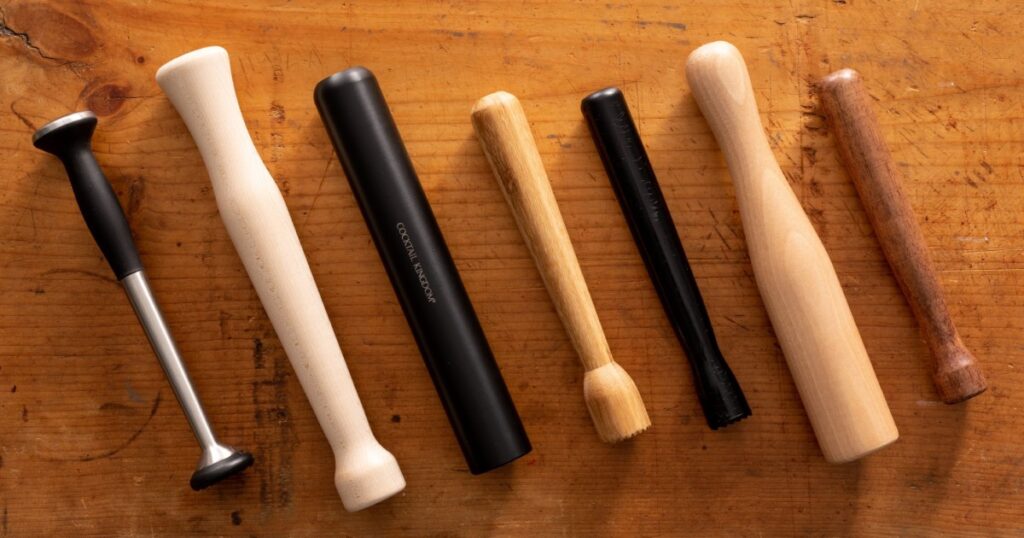
Muddler
If you plan to muddle fruit or mint (see WEEK 3: Technique post later), you want a Muddler. These are traditionally made of wood, but I like a heavy plastic one I can throw it in the dishwasher and not worry about the finish. It should have a wide, flat base (without any teeth or waffling) so you can bruise but not tear mint.
Fine Strainer
I use this all the time (to Double Strain – see WEEK 3: Technique post later), but then again when I make a shaken drink, I am bothered by small shards of ice floating on the surface. If you ever shake a cocktail that is shaken with mint leaves, this is a must, unless you want your teeth (or your guest’s teeth) full of little green specks. These are cheap, and probably should be included in the essential list.
Channel knife
If you like Martinis, this can be your best friend. As you peel the thin, sexy strip that will look like a pro made your Martini, the fine spray of oils will add complexity to your minimalist drinks (see WEEK 3: Technique post later),
Mandolin
If you entertain a lot, you may think about this. You may actually already have one. They are used for slicing fruits and vegetables. If you are not great with a knife, it will help ensure your slices of lemon, lime, and orange are consistent in thickness. I don’t have one but keep thinking about buying one.
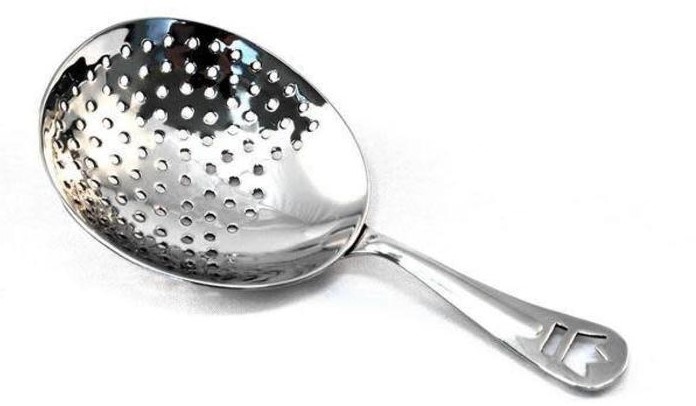
Julep Strainer
If you have a Hawthorn Strainer you don’t need one. Many people use these as their only strainer, but it will not strain as finely as a Hawthorn Strainer. If you like mint juleps, buy one. They are often included with the mint julep to keep ice and mint out of the drinker’s mouth (see WEEK 3: Technique post later).
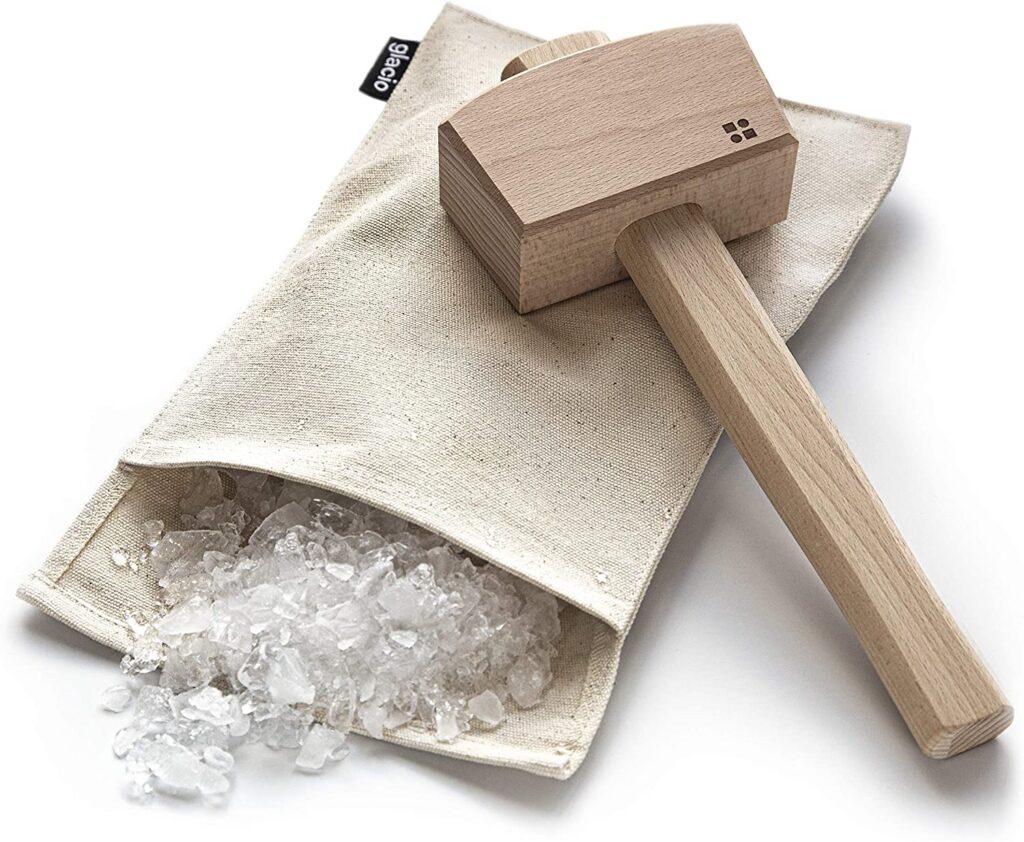
Lewis Bag/Mallet
I don’t use the set often, because I find buying a bag of pebble ice from Sonic is so much easier. However, it is very useful if you don’t. The ice is placed in the bag and it is beaten until the consistency is to your liking. The canvas bag absorbs the water so when you are done you have a bag full of fine, dry ice. And if you have a bag of ice (especially a bag of pebble ice) you can use the mallet to break up chunks frozen together.
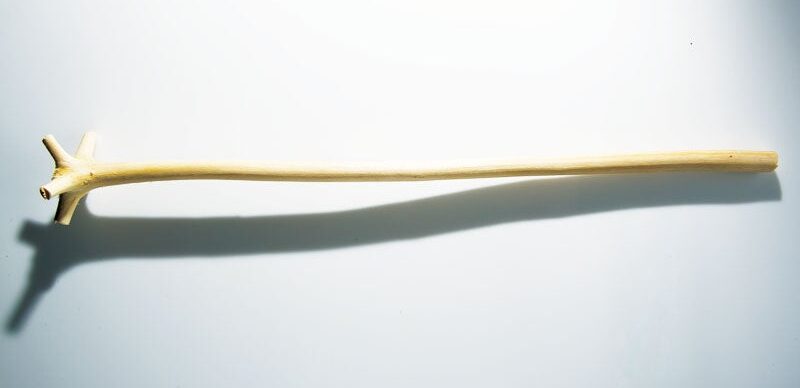
Swizzle Stick / “Le Bois Lélé”
If you like Swizzles, this is something to investigate. This is not the plastic stick with the name of the bar on it you may be thinking about. It is an actual stick – a Le Bois Lélé – that is twirled in a drink with crushed ice to super-cool it (see WEEK 3: Technique post later). Yes, you can use a bar spoon – but come on! It’s pretty cool.
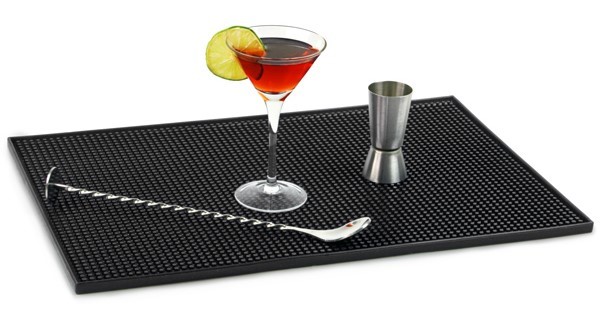
Rubber Bar Mat
Do you need one? Absolutely not. Do I love mine? Yes. They come in tons of different sizes (I use a 6” x 12”), are very useful, and are cheap. They catch excess liquor and sticky mixers, keeping your work surface clean. Plus, when you are making drinks over a period of time you can rinse your shakers, mixing glasses, jiggers, and strainers and set them on the mat to drip dry. Just rinse it off periodically or when done for the night.
Up next week – WEEK 2: Spirits, to make sure your bar can handle most of your guest’s requests.
Cheers!
Bill
AotCB-46